DIY Dermaplaning
by Emily Linehan on October 25, 2022
If you’re interested in skincare, you’ve likely already heard about Dermaplaning. If you aren’t already familiar, dermaplaning is a professional skin treatment designed to exfoliate your skin. The goal is to exfoliate the top layer of dead skin cells, but the reason most people love it is because, with the dead skin cells, the vellus hair (or peach fuzz) is removed as well. This procedure reveals a smoother, brighter complexion, which is why it has become such a popular treatment. Although it’s been around for quite a while, “at-home” dermaplaning has recently been in the spotlight.
While a professional treatment by a licensed esthetician is the safest, most effective option, there are some tools that can be used carefully at home to achieve that fuzz-free appearance.
Before we get into how to safely perform this procedure at home, it’s important to understand whether dermaplaning is right for you.
Benefits and Risks
One of the most buzzworthy benefits of dermaplaning in recent years is its ability to remove vellus hair (peach fuzz). This results in a smoother complexion, which can give you that “dolphin skin” look, and helps with flawless makeup application. Taking its original purpose into consideration, dermaplaning is a form of exfoliation, so in addition to removing peach fuzz, it also removes dead cells from the skin surface, allowing the ingredients in your skincare products to penetrate deeper and work more effectively. It can also help improve uneven skin texture, resulting in a brighter, more even-toned complexion.
Sounds great, right? It is! However, there are some risks with dermaplaning to keep in mind, especially if you plan on doing the treatment at home. The first is that over-exfoliation can damage the skin barrier, so you’ll want to be cautious to not overdo it with chemical or physical exfoliants when dermaplaning. In addition, if not done properly or with the appropriate tools, dermaplaning can spread acne bacteria or lead to more inflammation on the skin due to irritating friction, which can trigger breakouts or rash-type irritation.
What Skin Types is Dermaplaning For?
Dermplaning can be beneficial for most skin types! Those that tend to be more on the oily side may appreciate it the most since it helps to remove excess oil that can clog pores and cause breakouts.
While it may be tempting to try dermaplaning immediately, it should never be done over active acne. When getting a professional dermaplaning treatment, the esthetician can perform the treatment around mild active acne lesions, however, the esthetician should never go over active acne. This is because dermaplaning on active acne will spread acne bacteria around which significantly increases the risk of new acne formation. That being said, if you have active acne you should definitely not do this at home. Instead, I always advise my clients that their skin should be fully and consistently clear for several weeks before dermaplaning.
Another category that dermaplaning may not be appropriate for is those with very sensitive skin. It can result in folliculitis, which is an irritation of the hair follicle, or small bumps. Sometimes people mistakenly think they developed acne after dermaplaning, however it is actually more commonly a histamine reaction that’s happening that creates those little blemishes.
So, if either of those sounds like you, please do not try dermaplaning at home! Or, if you’re unsure, I highly recommend that you consult a professional, licensed esthetician in your area. If you’re local to Scottsdale, we’d love to see you at our studio, however, if you aren’t local be sure to check out my #EmmeApproved Acne-Safe Facial Treatment blog for tips on finding an esthie-bestie in your area!
How to Dermaplane at Home (Safely!)
Before you dive into dermaplaning it’s very important to find the right tool. I personally recommend this dermaplaning tool, or a Gillette ProGlide razor. Both are fairly inexpensive and can be found on Amazon. You’ll also want to ensure you do this at the appropriate time. I recommend that dermaplaning be done at night, and no more than once a month (about 3 to 4 weeks between treatments).
#EmmeTip: Be sure to carefully read the instructions for the specific tool you chose!
To begin, you’ll want to start with fresh, clean skin which means you’ll need to double cleanse. The first cleanse removes any makeup or SPF, and the second is to remove dirt and oil from the skin.
#EmmeTip: Be sure to rinse with cool or lukewarm water to avoid dryness!
Next, allow your skin to dry before moving on. This will ensure you get the most benefit with the least amount of friction. However, if you are especially dry and find that your skin chafes easily, you can apply a thin layer or moisturizer to help protect the skin.
Once the skin has dried, start making light, upward or downward strokes on the areas you want to treat. Be sure to be extra gentle in sensitive areas, like the lips and eyes, and be careful of the hairline and eyebrows. You will want to avoid doing too many passes on the skin as it can over-exfoliate and lead to irritation. This means that you should always start with a fresh, sharp blade. (I never recommend reusing blades!)
After you’ve treated all areas, you will want to cleanse the skin again, then ice the skin and follow with your toner and Skin Quencher Gel. If you are acne prone and are using Acne Eraser, you will still apply it that night after dermaplaning as usual.
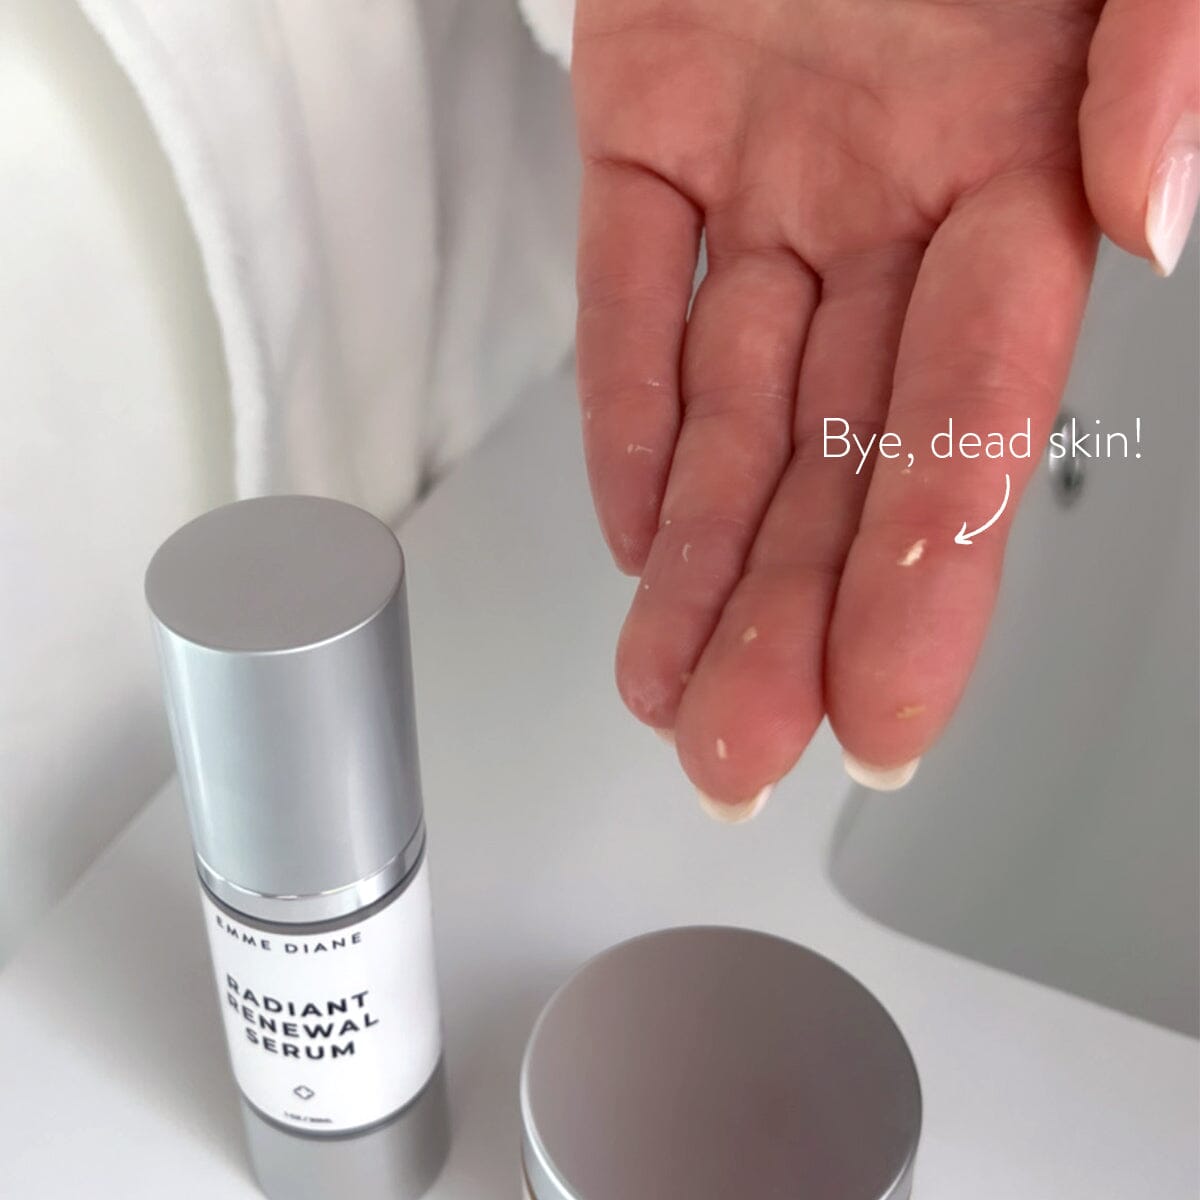
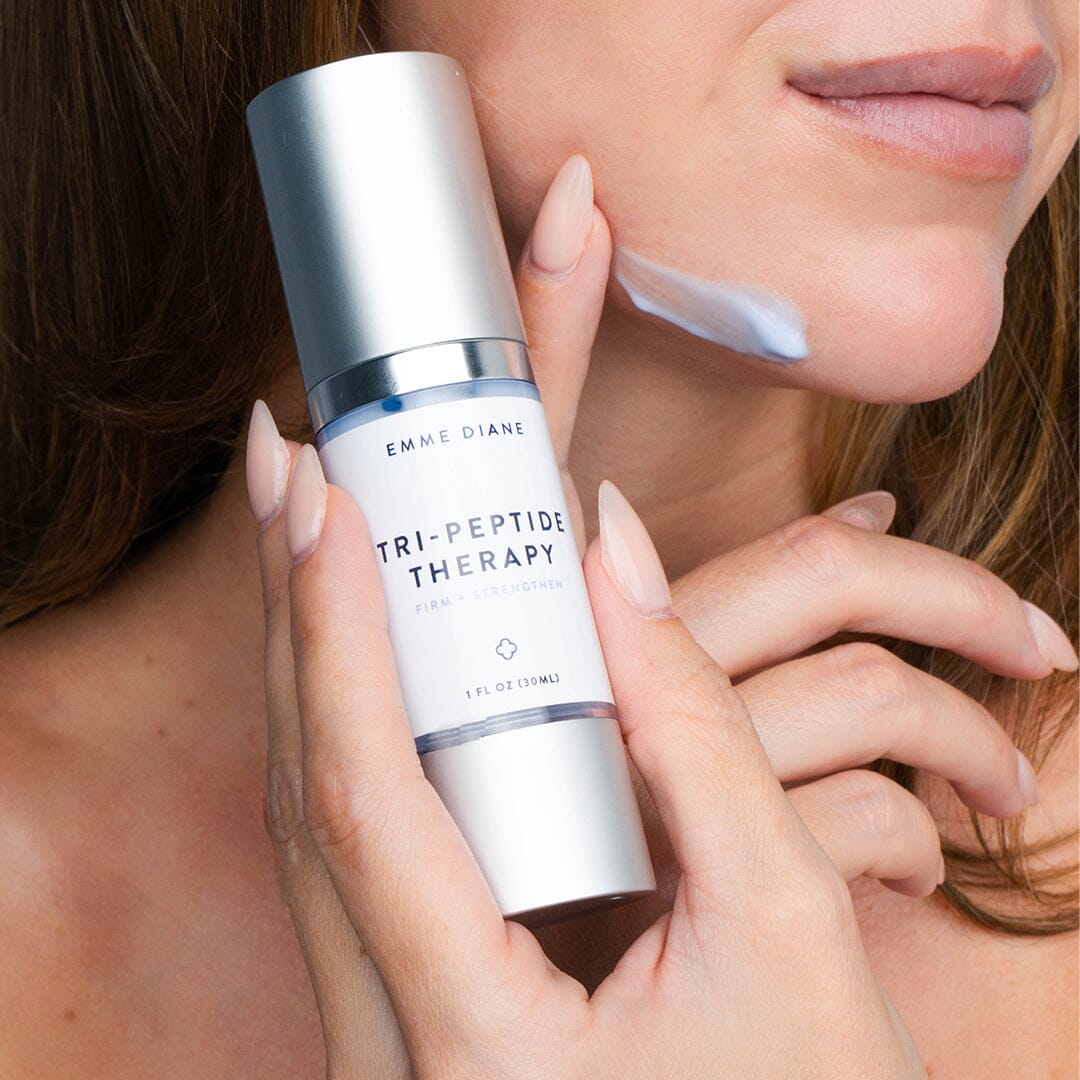
If you are someone that uses an active serum (such as Pro-Retinol, Clarifying, Brighten Up, Enlightened, or Radiant Renewal Serum) at night, skip it and focus on a hydrating routine instead to avoid any additional irritation. This can include applying a hydrating serum, like Firming Peptide Serum, and your moisturizer. You can also help give your skin a little extra TLC by applying our soothing Cucumber Cooling Mask.
After dermaplaning, you should avoid direct sunlight for the next few days (and don’t forget your sunscreen!) You’ll also want to do your best to avoid any irritants (like pet dander) and refrain from applying makeup until the next day. When you do apply makeup be sure to sanitize your brushes thoroughly before using them.
Dermaplaning can be a great way to achieve a smoother, brighter complexion, however, it should always be done carefully. If you decide to try this at home, please be extremely cautious and make sure it’s suitable for your skin type prior to proceeding to avoid any adverse effects!
xoxo, Emme
Related Posts

Acne-Safe Makeup List
How to Use Tri-Peptide Therapy (and Why It's a Game-Changer for Your Skin)